Stop Renting Your Digital Life: Build a Home Server for Under $200
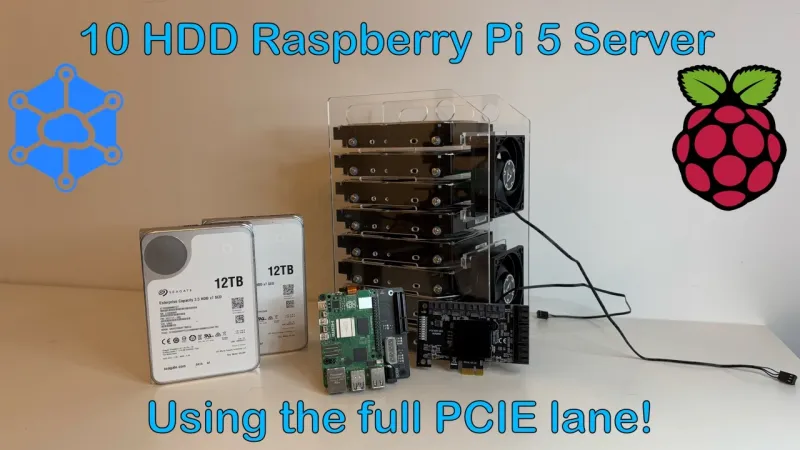
Photo: small home server setup desk with raspberry pi and hard drives, via i.ytimg.com
Let's do some quick math. Dropbox Plus: $11.99/month. Netflix Standard: $15.49/month. Google One storage: $2.99/month. A Spotify family plan: $16.99/month. Toss in a smart home hub subscription and you're looking at $60 or more every single month — over $700 a year — flowing out of your wallet and into the pockets of companies whose entire business model depends on knowing everything about you.
What if you just... stopped?
A self-hosted home lab isn't a fantasy reserved for sysadmins with a rack full of enterprise gear in their basement. With a modest one-time hardware investment and a few weekends of tinkering, you can run your own private cloud, your own media server, and your own smart home brain — with your data staying exactly where it belongs: in your house, under your control.
This guide is for people who are curious, maybe a little privacy-conscious, and willing to learn. You don't need a computer science degree. You need a spare machine, an internet connection, and the willingness to read some documentation.
What You're Actually Building
Before we get into hardware, let's talk about what a home lab can realistically replace:
- Nextcloud replaces Google Drive / Dropbox — file sync, photo backup, calendar, contacts, even video calls
- Jellyfin replaces Netflix/Plex — stream your own media library to any device in your house (or away from home)
- Home Assistant replaces proprietary smart home hubs — control your lights, locks, sensors, and automations without your data touching anyone else's server
- Vaultwarden (a lightweight Bitwarden server) replaces LastPass or 1Password — your password vault, your hardware
- Pi-hole replaces nothing, but blocks ads and tracking at the network level for every device in your home
You don't have to run all of these on day one. Most people start with one service, get comfortable, and expand from there.
The Hardware Shopping List
Here's the honest beginner-friendly hardware breakdown. You have options depending on your budget and goals.
Option A: Raspberry Pi 5 (~$80–$100 total)
The Raspberry Pi 5 is a credit-card-sized Linux computer that sips power (under $5/month in electricity at typical US rates). It's perfect for running Nextcloud, Pi-hole, Vaultwarden, and Home Assistant simultaneously without breaking a sweat.
- Raspberry Pi 5 (4GB): ~$60
- MicroSD card (64GB, decent brand): ~$10
- USB-C power supply: ~$12
- Case with cooling fan: ~$10
Total: roughly $90–$100. You probably already have an old USB hard drive lying around for storage expansion.
Option B: Repurposed Mini PC (~$100–$180)
If you want more horsepower — especially for Jellyfin, which benefits from hardware video transcoding — grab a used mini PC from eBay or Facebook Marketplace. An old Intel NUC, a Beelink mini PC, or even a decommissioned corporate thin client can be had for $80–$150. Slap a fresh SSD in it if needed, install a lightweight Linux distro like Ubuntu Server or Debian, and you've got a capable little server.
Either option lands well under $200, and unlike a cloud subscription, you own it outright.
Getting Your Network in Order
Before you install a single piece of software, spend some time thinking about networking. This is where a lot of first-timers get tripped up, and where the biggest security considerations live.
Give your server a static local IP. Log into your router (usually 192.168.1.1 or 192.168.0.1 in most US homes) and assign a DHCP reservation to your server's MAC address. This means the server always gets the same local IP, which makes configuration much easier.
Decide if you need remote access. Accessing your Nextcloud files while you're at the office or on vacation requires either port forwarding or a VPN tunnel. Port forwarding is simpler to set up but exposes your server to the internet — which means security matters a lot. Tailscale is a free, incredibly easy-to-configure VPN solution that keeps your server off the public internet entirely while still letting you connect from anywhere. For beginners, Tailscale is the move.
Keep things updated. Enable automatic security updates on your server OS. This one habit prevents the vast majority of real-world attacks.
Installing Your First Service: Nextcloud
The fastest path to a working Nextcloud instance for beginners is Nextcloud AIO (All-in-One), which uses Docker to bundle everything you need into a single installation process.
Here's the general flow:
- Install Docker on your server (
curl -fsSL https://get.docker.com | shon most Debian/Ubuntu systems) - Pull and run the Nextcloud AIO Docker image (the official documentation walks through this in about ten minutes)
- Access the setup interface from your browser at
https://[your-server-ip]:8080 - Follow the wizard to configure storage, create your admin account, and enable the features you want
Once it's running, install the Nextcloud app on your phone. Point it at your server's address, log in, and watch your photos start syncing — to your hardware, not Google's.
Adding Jellyfin for Your Media Library
Jellyfin is the fully open-source, no-subscription alternative to Plex. It organizes your movies, TV shows, and music, scrapes metadata and cover art automatically, and streams to phones, smart TVs, Roku devices, and browsers.
Installation is straightforward via Docker as well. Point Jellyfin at a folder where your media lives (an external hard drive works great), let it scan your library, and within minutes you've got a Netflix-style interface serving your own content. On a mini PC with an Intel processor, Jellyfin can use hardware-accelerated transcoding to stream to multiple devices simultaneously without the CPU melting.
Home Assistant: Your Smart Home, Your Rules
Home Assistant deserves its own article (and will get one here on Linux Nerds eventually), but the short version: it's a local smart home platform that integrates with over 3,000 different devices and services without requiring any of them to phone home to their manufacturer's cloud.
Your Philips Hue lights, your Ecobee thermostat, your Ring doorbell, your IKEA sensors — Home Assistant can talk to all of them, locally, and let you build automations that work even if the internet goes down. For privacy-conscious Americans who've grown wary of smart home devices that stop working the moment a company goes under or changes its terms of service, this is a revelation.
The easiest installation method is Home Assistant OS on a dedicated Raspberry Pi, or as a virtual machine on your mini PC.
The Long-Term Math
Let's revisit that $700/year figure from the intro. A $150 mini PC, running continuously at low power, costs roughly $40–$60 per year in electricity (at average US rates). Year one, you're close to break-even. Year two? You're saving $600 or more annually — while keeping your files, your media library, and your smart home data entirely off someone else's servers.
That's the open-source promise made tangible: invest a little time upfront, and you trade recurring fees and privacy trade-offs for ownership and control.
Where to Go From Here
The self-hosting community is one of the friendliest corners of the Linux world. The r/selfhosted subreddit is an excellent starting point, and the Awesome Self-Hosted GitHub repository maintains a comprehensive list of open-source alternatives to virtually every cloud service you can think of.
Start small. Get one service running. Get comfortable with it. Then add the next one. Within a few months, you might find yourself wondering why you ever paid someone else to store your own files.
Your data. Your rules. Your server. Welcome to the lab.